Vor einer Weile ist mir der Burfleet-Knoten gezeigt worden, welcher für eine gute und flächige Lastverteilung aufs Handgelenk sorgt. Dummerweise hatte ich nicht mehr sämtliche Details im Kopf, als ich die dazu passenden Photos gemacht habe, und daher eben nicht den Originalknoten zusammengeschnürt. Die von mir zusammengeschusterte Variante sollte zwar auch brauchbar sein, ist aber eben nicht das Original.
A while ago I have been shown the Burfleet Knot which spreads the load evenly on the wrist. Unfortunately I did not remember all the details when trying to take a photo series of this knot. I think an hope that the variation I put together might be usable as well but certainly it is not the original thing.

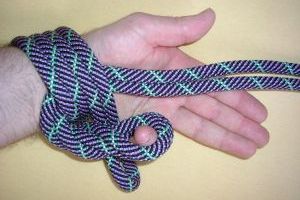
Erster Schritt.
Eigentlich sollte es noch eine Wicklung mehr sein, aber dafür
ist mein farbiges Seil leider leider ein wenig zu kurz.
First step. In principle one should pass the original bight three times around the wrist, not just twice, but my rope was just a little bit on the short side.
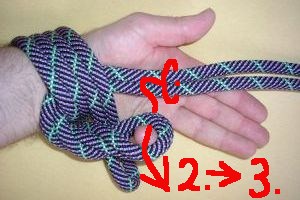
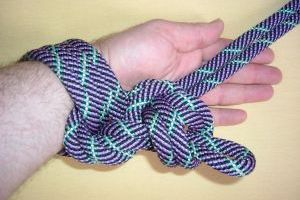
Zweiter Schritt.
Nachdem man noch etwas loses Seil unter dem Handgelenk durchgezogen hat,
verzwirbelt man das Ende typischerweise zwei Mal.
Second step. Twease some of the main rope under the turns so there is some slack at the shoulder end and then give this slack two half turns to create a loop.
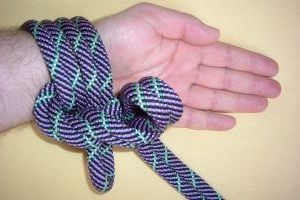
Dritter Schritt.
Third step.
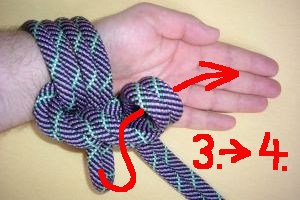
Vierter Schritt.
Fourth step.
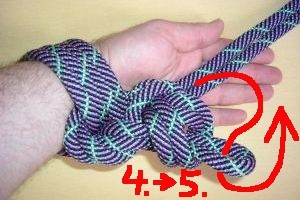
Fünfter Schritt.
Fifth step.
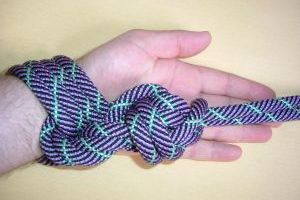
Als Faustregel, damit das Seil nicht zu eng ist, sollte man noch zwei Finger zwischen Seil und Handgelenk schieben können.
As a rule of thumb to avoid having the rope too tight one should always be able to stick two fingers in between rope and wrist.